A knitted hat is a great way to practice knitting continental style with the yarn held in the left hand. Continental knitting has the advantage of being faster than English style knitting, especially for patterns that require swapping between knits and purls, such as ribbing. It's also a way to try out circular knitting, either with 2 circular knitting needles or with a set of double pointed needles or a combination of both.
Materials
2 x 4mm circular knitting needles and/or set of 4mm double pointed knitting needles. Approx 200 meters of double knit yarn, 100% wool or a yarn with a high wool content to give the hat plenty of stretch.
I used 2 balls of Sublime extra fine Merino wool.
Tension: 22 sts x 28 rows = 10cm x 10cm. Thankfully the tension isn't too critical, which makes this an ideal project for trying out a different knitting style or technique.
 Knitted Hat Pattern
Using the long tail cast on, cast on 101 stitches. It is important not to cast on too tightly, the edge of the hat needs to stretch easily. The stitches should fit comfortably round a 40cm circular needle if you want to knit the first stage on a single circular knitting needle. Alternatively divide the stitches between 2 circular needles or 3 double pointed needles.
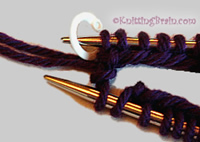
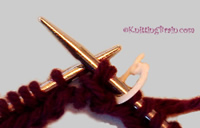
Whatever your chosen method, ensure the stitches aren't twisted. Put the first and last stitch together at the end of the left needle and place a marker to indicate the beginning of the round.
 Join for working in the round by holding the yarn tail and the working yarn together and knitting the first and last stitch together. (Make sure you treat this double stranded stitch as a single stitch when starting your second round.)
K1, P2. Continue in K2, P2 ribbing until work measures 24cm.
Work 1 round of K2, P2 together. If you are working on a single circular knitting needle you will need to swap to either 2 circular needles or a set of double pointed needles during this round. 75 stitches remaining.
Work in K2, P1 rib for a further 3cm.
Work 1 round of K2 together, P1. 50 stitches remaining.
Work in K1, P1 rib for a further 3cm.
K2 together until 7 stitches remain.
Cut yarn leaving approx. 20 cm tail of yarn. Using a darning needle thread the yarn through the remaining stitches and pull gently on the yarn tail to close the hole. Neatly sew a few stitches across the hole. Weave in the yarn tails.
Give the finished hat a gentle rinse in cold water with some fabric conditioner. Gently squeeze out the water then roll it in a towel and press down on the towel to dry further. Dry flat or over a head sized bowl. This will plump up your yarn, make the hat feel softer against the skin and even out the stitches.